How to Create Video from Photo with AI: 5 Best Methods in 2026
From a still photo to cinematic video in 2 minutes
August 2026 update: Seedance 2.5 generates videos from text or images up to 30 seconds long, with native audio and up to 30 reference images. See capabilities, examples and current pricing on the Seedance 2.5 page.
What Is Image-to-Video and Why It Matters
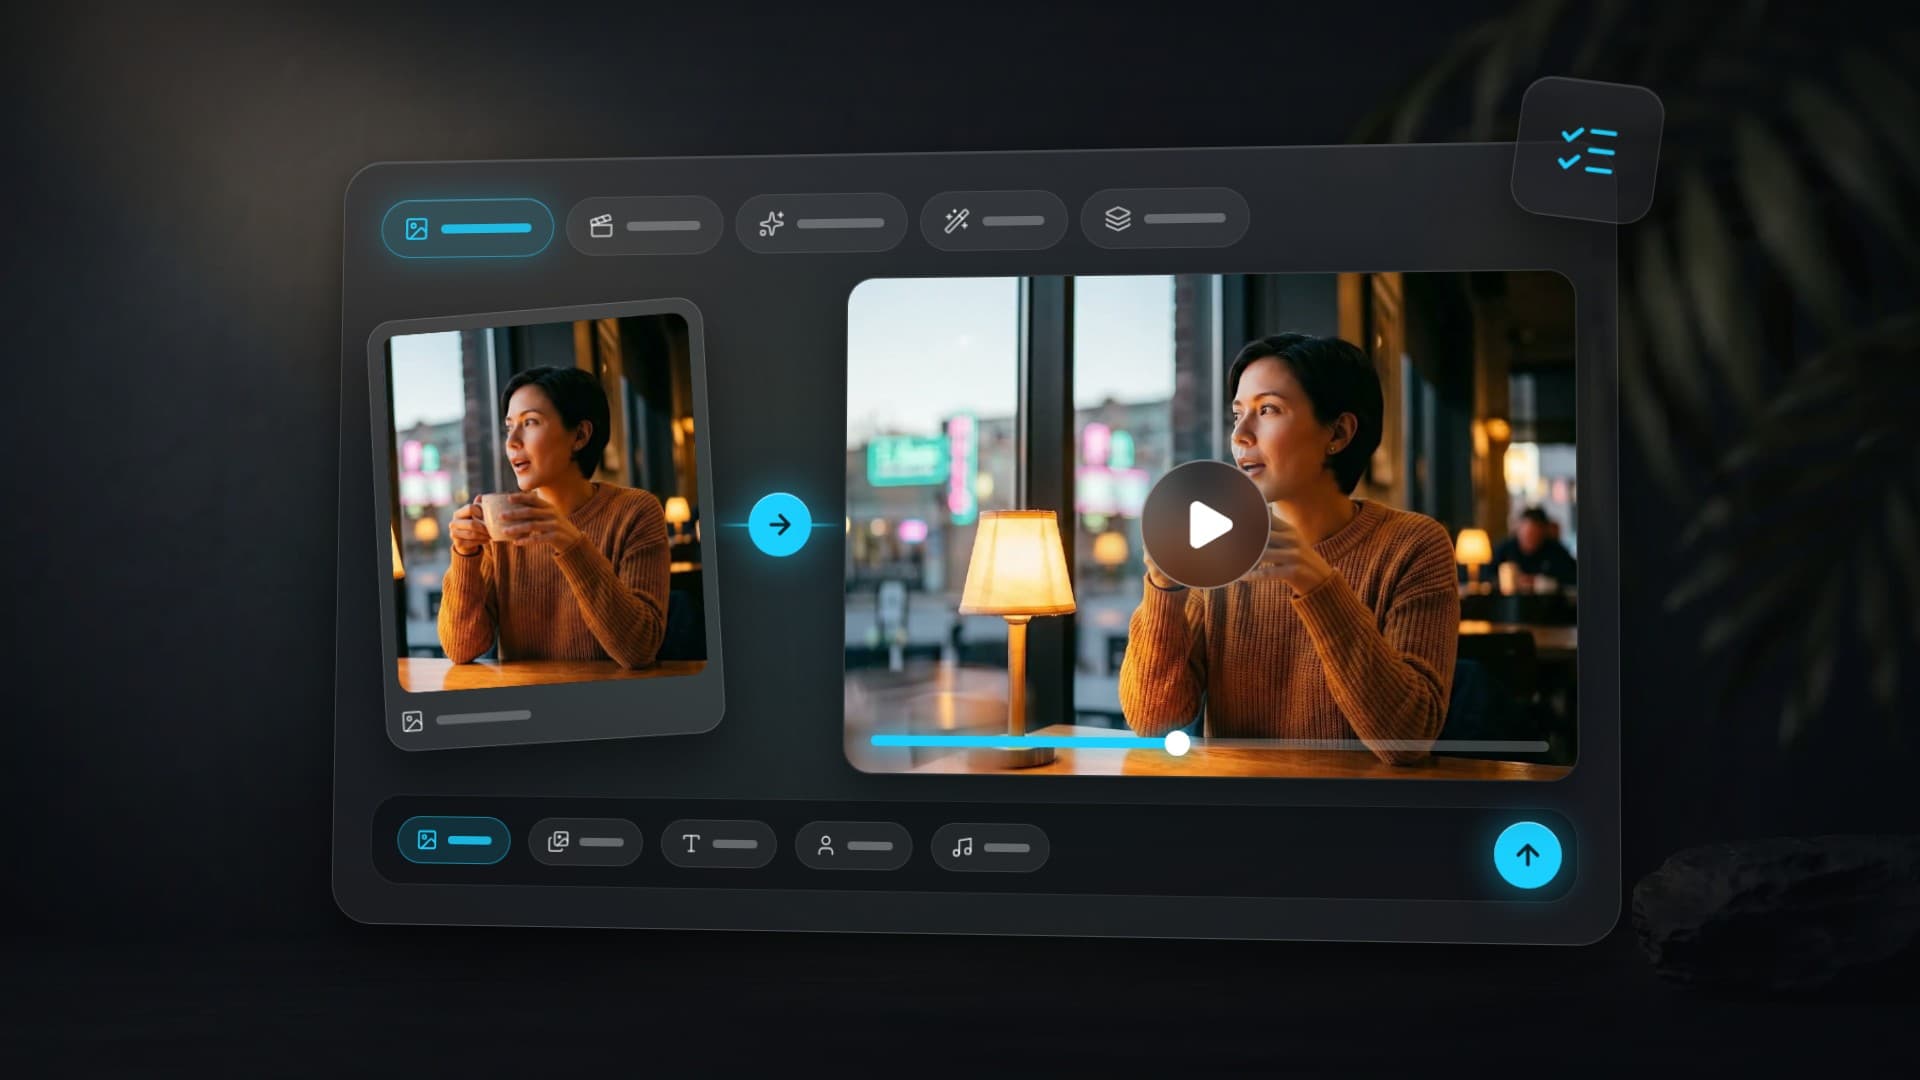
Image-to-Video (I2V) is a technology where AI analyzes a photograph and generates a video sequence with natural motion. A person turns their head, hair flows in the wind, the background comes alive — all in 1–3 minutes, no video editor needed.
Common use cases:
- Bring a portrait to life for Reels or TikTok
- Animate a product photo for advertising
- Create cinematic footage from a landscape shot
- Turn an illustration into an anime video
We tested every I2V model on the platform and selected the 5 best. For each — a ready-to-use prompt, video example, and current pricing.
1. Kling 3.0 — Cinematic Quality
Kling 3.0 by Kuaishou is the flagship I2V model. Cinematic physics: hair, fabric, and water behave realistically. Built-in audio generation — the model creates ambient sound and voice on its own.
A woman slowly turns her head to the right, gentle wind catches her hair, she smiles softly, warm golden hour lighting, shallow depth of field, cinematic film grain, ambient sounds of a summer eveningKey strengths:
- Cinematic camera movements (pan, zoom, orbit, dolly)
- Synchronized audio generation (ambient, voices)
- 3, 5, 8, 10, or 15 seconds; 720p or 1080p
- Excellent face preservation in portrait animation
Landscape prompt:
The camera slowly pushes forward through morning fog over a serene mountain lake, mist rises from the water surface, pine trees emerge from the haze, a lone deer stands at the shore, birds take flight, epic orchestral atmosphere, 4K cinematic quality
Pricing: the Kling 3.0 cost depends on duration, resolution and sound. Choose the settings and check the final price in the form before starting.
Best for: cinematic footage where physics and sound matter.
2. Seedance 2.0 — Top-Rated I2V
Seedance 2.0 by ByteDance consistently tops I2V benchmarks. Unique feature: up to 9 reference images using @image1...@image9 syntax, letting you define character, environment, and style simultaneously.
@image1 The person slowly opens their eyes, looks directly at the camera with a knowing smile, a gentle breeze moves through their hair, soft bokeh lights dance in the background, intimate close-up, cinematic color gradingKey strengths:
- Best-in-class face identity preservation
- Up to 9 reference images in a single prompt
- Natural micro-expressions and movements
- Up to 15 seconds duration
Multi-reference scene prompt:
@image1 stands in the environment shown in @image2, wearing the outfit from @image3. She walks confidently forward, the camera tracking alongside, dynamic fashion photography style, dramatic rim lighting, slow motion fabric movement
I2V pricing: Seedance 2.0 costs 34 credits for five seconds at 480p in Clipia’s matrix checked on October 14, 2026. Another Seedance variant, resolution or duration has its own quote; check it before starting.
Best for: preserving face identity and working with multiple reference images.
3. Hailuo 2.3 — Stylization and Art
Hailuo 2.3 by MiniMax excels at artistic stylization. It transforms ordinary photos into anime, watercolor, oil painting, and pixel art videos. Smooth animation without artifacts.
Portrait slowly comes to life in Japanese anime style, cherry blossom petals drifting past, eyes sparkle with gentle emotion, hair flows in soft wind, pastel watercolor background dissolves into soft focus, Studio Ghibli atmosphereKey strengths:
- Styles: anime, watercolor, oil painting, comic, pixel art
- Smooth facial expression animation
- Stable motion without morphing
- Fast generation (1–2 minutes)
Cinematic stylization prompt:
The photograph transforms into a cinematic oil painting in motion, thick brushstrokes become visible as the subject turns their head, warm Rembrandt lighting shifts across the face, the background melts into impressionist colors
I2V pricing: as checked on October 14, 2026, Hailuo 2.3 costs 17 credits for six seconds at 768p. Hailuo 2.3 Fast costs 11 credits for six seconds at 768p. Check the form for supported duration and quality combinations and the final price.
Best for: artistic videos, anime content, stylized Reels.
4. Grok Video — Video with Sound
Grok Video by xAI is unique in its focus on audio. It generates not just motion but background music, atmospheric sounds, and environmental noise. The most affordable I2V model on the platform.
The portrait comes alive as a jazz musician, fingers begin tapping rhythmically on the table, head nodding to an unheard beat, warm cafe ambiance with soft piano music playing, steam rising from a coffee cup, moody evening lightingKey strengths:
- Built-in audio generation (music, ambient, SFX)
- Good detail in portrait work
- Lowest price among I2V models
- Up to 10 seconds duration
Atmospheric prompt:
A coastal landscape photograph awakens — waves begin crashing against rocks, seagulls cry overhead, wind rustles through beach grass, the lighthouse beam sweeps across fog, cinematic ocean sounds, golden hour fading to blue hour
Pricing for the model in the example: Grok Video costs 10 credits for six seconds or 15 credits for ten seconds in Clipia’s matrix checked on October 14, 2026. Grok Imagine Video 1.5 has different settings and prices; check the selected version in the studio before starting.
Best for: videos with sound, atmospheric and musical clips, budget-friendly generation.
5. Veo 3.1 — First + Last Frame transitions
Veo 3.1 by Google — flagship video model with First + Last Frame support: upload two images (starting and ending frame), and the model generates a seamless transition between them. Not just animation of a single photo, but a real cinematic cut with synchronized audio.
Key strengths:
- First + Last Frame — morph between two scene states
- Synchronized audio generation (ambient, music, SFX, dialogue)
- Photorealism and stable subject identity
- Duration up to 8 seconds, 720p / 1080p resolution
- Two variants: Veo 3.1 Fast (cheaper) and Veo 3.1 Quality (higher detail)
Example: "day → evening" transition in the same location:
Seamless cinematic transition from morning to evening in the same cafe. The woman subtly breathes and shifts her weight, her eyes slowly drift toward the window as afternoon sunlight gradually warms, deepens, and dissolves into twilight. Warm tungsten lamplight fades up on her face. Neon reflections begin to dance in the window glass behind her. Steam keeps rising softly from her cup throughout the shot. Ambient sound transitions from distant morning chatter and clinking cups to quiet evening jazz and rain on the window, cinematic color grading, smooth time-lapse feel with natural motion, 8 secondsHow to use First + Last Frame:
- Upload the first image — the starting state of the scene
- Upload the second image — the ending state (same subject and angle, only lighting, pose or details differ)
- Describe the transition and atmospheric sounds in your prompt
- Veo 3.1 generates an 8-second clip with a smooth morph
FL transition ideas: day → night, realistic portrait → stylized persona, seasonal change in one location, before/after transformation, emotional shift.
Pricing: Clipia’s matrix checked on October 14, 2026 lists Veo 3.1 Fast at 22 credits and Veo 3.1 Quality at 92 credits for 4, 6 or 8 seconds at 720p. For another resolution or mode, check the available settings and final price in the form before starting.
Best for: cinematic cuts, morphs between two states, or premium animation with built-in audio.
Step-by-Step Guide: Photo to Video in the New Studio
Step 1. Open the Video Generator
Open Image to video. Choose Single image for a single source image. Choose First & last frame for a defined beginning and ending, or References for multiple source images. The model list adjusts to your input mode.
Step 2. Upload Your Photo
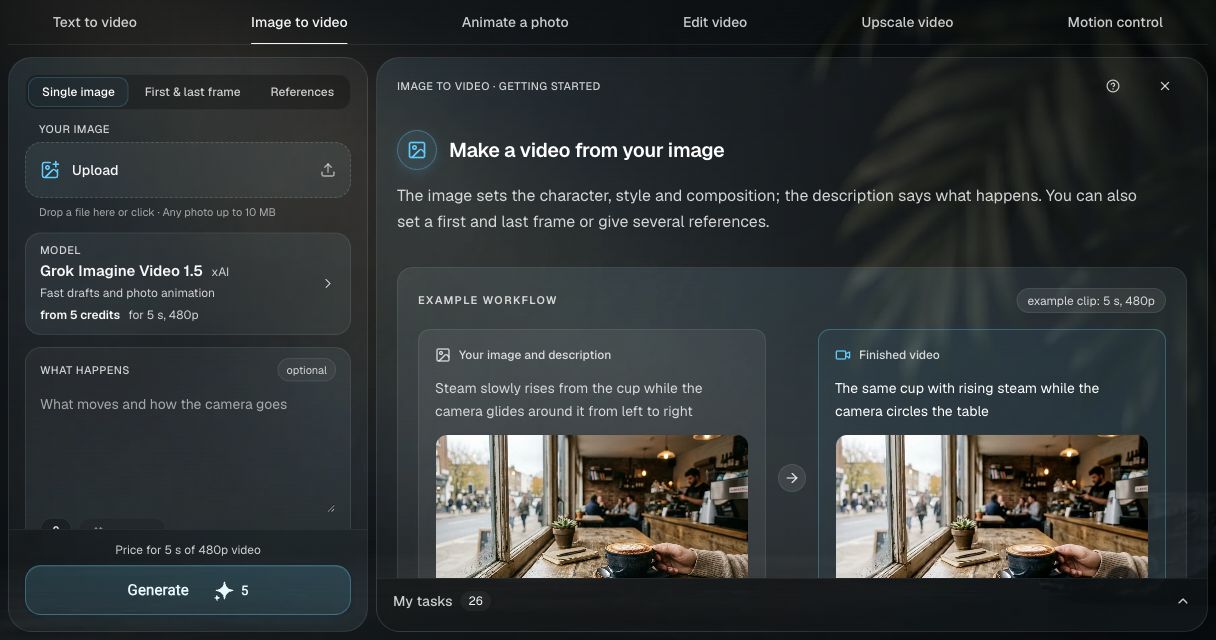
Click Upload in the source-image field. Then open Model and choose a model for that input mode. Check the limits shown in the form and the image quality:
- Resolution: 512×512 px minimum (1024×1024+ recommended)
- Format: JPG, PNG, WebP
- Clarity: no heavy blur or overexposure
- For portraits: face should be clearly visible, front-facing or 3/4 angle preferred
Step 3. Write a Prompt
In What happens, describe one subject movement and the camera behavior. You can use the prompt-enhancement control beside the field to refine the wording; review its suggestion before starting. A prompt can be optional in Single image mode, but a specific instruction gives you more control.
Examples for different genres:
Portrait: She slowly turns her head, gentle smile, hair catches the wind, soft natural lighting, shallow depth of field
Landscape: Waves begin to crash, clouds drift across the sky, birds fly in the distance, golden hour light shifts, ambient ocean sounds
Product: The product rotates slowly on a reflective surface, dramatic studio lighting reveals textures, premium commercial quality
Step 4. Configure Parameters
- Aspect ratio: 9:16 for TikTok/Reels, 16:9 for YouTube, 1:1 for Instagram
- Duration: start with a short value offered by the selected model
- Quality: choose an available resolution. Labels and options depend on the model; Auto in Aspect ratio, where available, uses the source image’s proportions
Step 5. Generate
Check the price on the Generate button, then start the task. Progress and the finished clip appear in the same studio and in My tasks. Open the result and choose Download → MP4 video. Waiting time depends on the model, settings and queue.
Tips for Better Results
Photo quality matters most. Blurry or dark photos produce blurry videos. Ideal: a sharp portrait in good lighting, 1024px+ resolution.
Be specific about motion.
- Bad:
make her move - Good:
slowly turns head to the right, hair catches the wind, eyes blink naturally
Start with short videos. 5 seconds is optimal for I2V. Longer videos (15+ sec) cost more and produce more artifacts.
Specify camera style. Words like cinematic, shallow depth of field, tracking shot significantly improve results.
I2V Model Comparison
| Model | I2V Quality | Face Preservation | Audio | Max Duration | Price for stated settings |
|---|---|---|---|---|---|
| Kling 3.0 | 5/5 | 4/5 | Optional | 3–15 sec (3/5/8/10/15) | See generator |
| Seedance 2.0 | 5/5 | 5/5 | By setting | 15 sec | 34 cr (5 sec, 480p) |
| Hailuo 2.3 | 4/5 | 3/5 | No | 10 sec | 17 cr (6 sec, 768p) |
| Grok Video | 3/5 | 3/5 | Yes | 10 sec | 10 cr (6 sec) |
| Veo 3.1 | 5/5 | 5/5 | Yes | 8 sec | 22 cr (Fast, 4–8 sec, 720p) |
Can I animate any photograph?
Yes, but results depend on source quality. Best results come from portraits with clear faces, landscapes with distinct elements (water, clouds, trees), and product photos on solid backgrounds. Group photos and images with fine details produce less stable results.
Do I need to write prompts in English?
You can describe the motion in your own language or use an English prompt. If you use the studio’s prompt enhancement, review the result: it should preserve your idea without adding unwanted actions.
More on AI Video Generation
- Complete guide to AI video models — all 10 models, modes, and pricing
- Seedance 2 vs Kling 3 vs Veo 3 comparison — real benchmarks of the top 3 models
- 10 cinematic video prompts — copy-ready templates by genre
Frequently Asked Questions
How much does one generation cost?
Cost depends on the selected model version, duration, resolution and sound. Check the model and parameters in the studio: the total on Generate applies to that specific configuration.
What is the difference between I2V and T2V?
T2V (Text-to-Video) generates video from scratch based on a text description. I2V (Image-to-Video) takes your photograph and animates it. I2V better preserves details, faces, and the style of the original image — results are more predictable.
What video format is best for social media?
For TikTok and Reels — vertical 9:16. For YouTube — horizontal 16:9. For Instagram feed — square 1:1 or 4:5. Format is selected before generation in the settings.
Can I add sound to the video?
Kling 3.0 can add sound when the sound option is enabled. For a model without a sound option, add audio in an editor after downloading.
Try it yourself on Clipia
60+ models for video and image generation. One account, transparent pricing.