How to Use an AI Image Generator: 5 Ways to Create and Edit Images
Text to image, photo edits, combining photos, upscaling and carousels — step by step, with prompts, credit prices and common mistakes
Most people use an AI image generator the same way for every job: type a prompt, hope for the best. That works for a brand-new picture and fails for everything else. Ask a text-to-image model for a new background on your portrait and you get a new face too. To use an AI image generator well, pick the mode first and write the prompt second. Clipia's image studio has five of them: text to image, photo editing, combining photos, quality enhancement and carousels. Here is when to use each one, what to click, and what it costs in credits.
Quick answer: which mode to pick
| Your task | Tab | What you provide | Price |
|---|---|---|---|
| A new image from scratch | Text to image | A description of the scene | from 4 credits per 2K image |
| Swap a background, change an outfit, remove an object | Edit photo | A photo and one instruction | from 4 credits |
| Build one scene from several pictures | Combine photos | 2 to 8 photos and a description | from 4 credits; the number of photos does not change the price |
| Make a photo sharper and larger | Enhance quality | One photo | 3 credits |
| A swipeable series of slides | Carousel | A topic or your own text | illustration price is shown before you run it |
Prices are for the default model in each tab as of October 13, 2026. The exact amount is always on the button before you start.
What is an AI image studio?
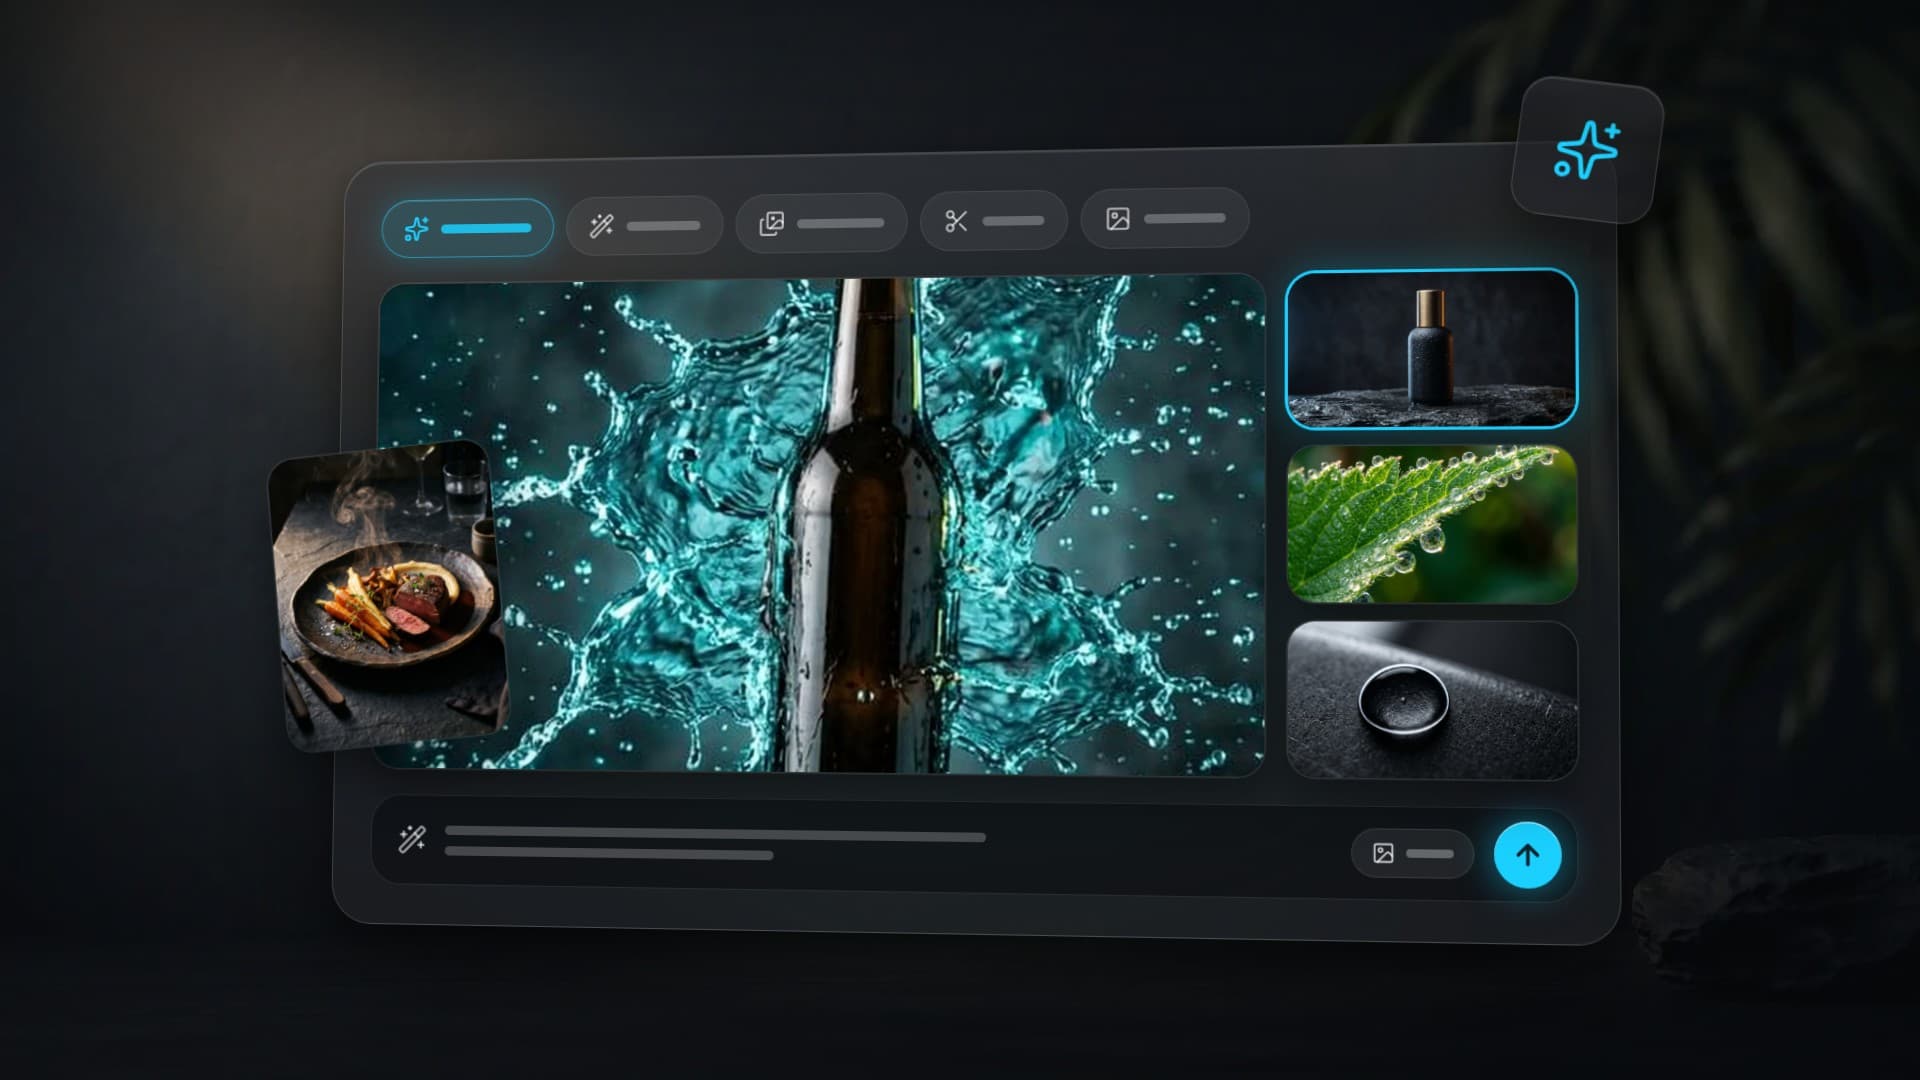
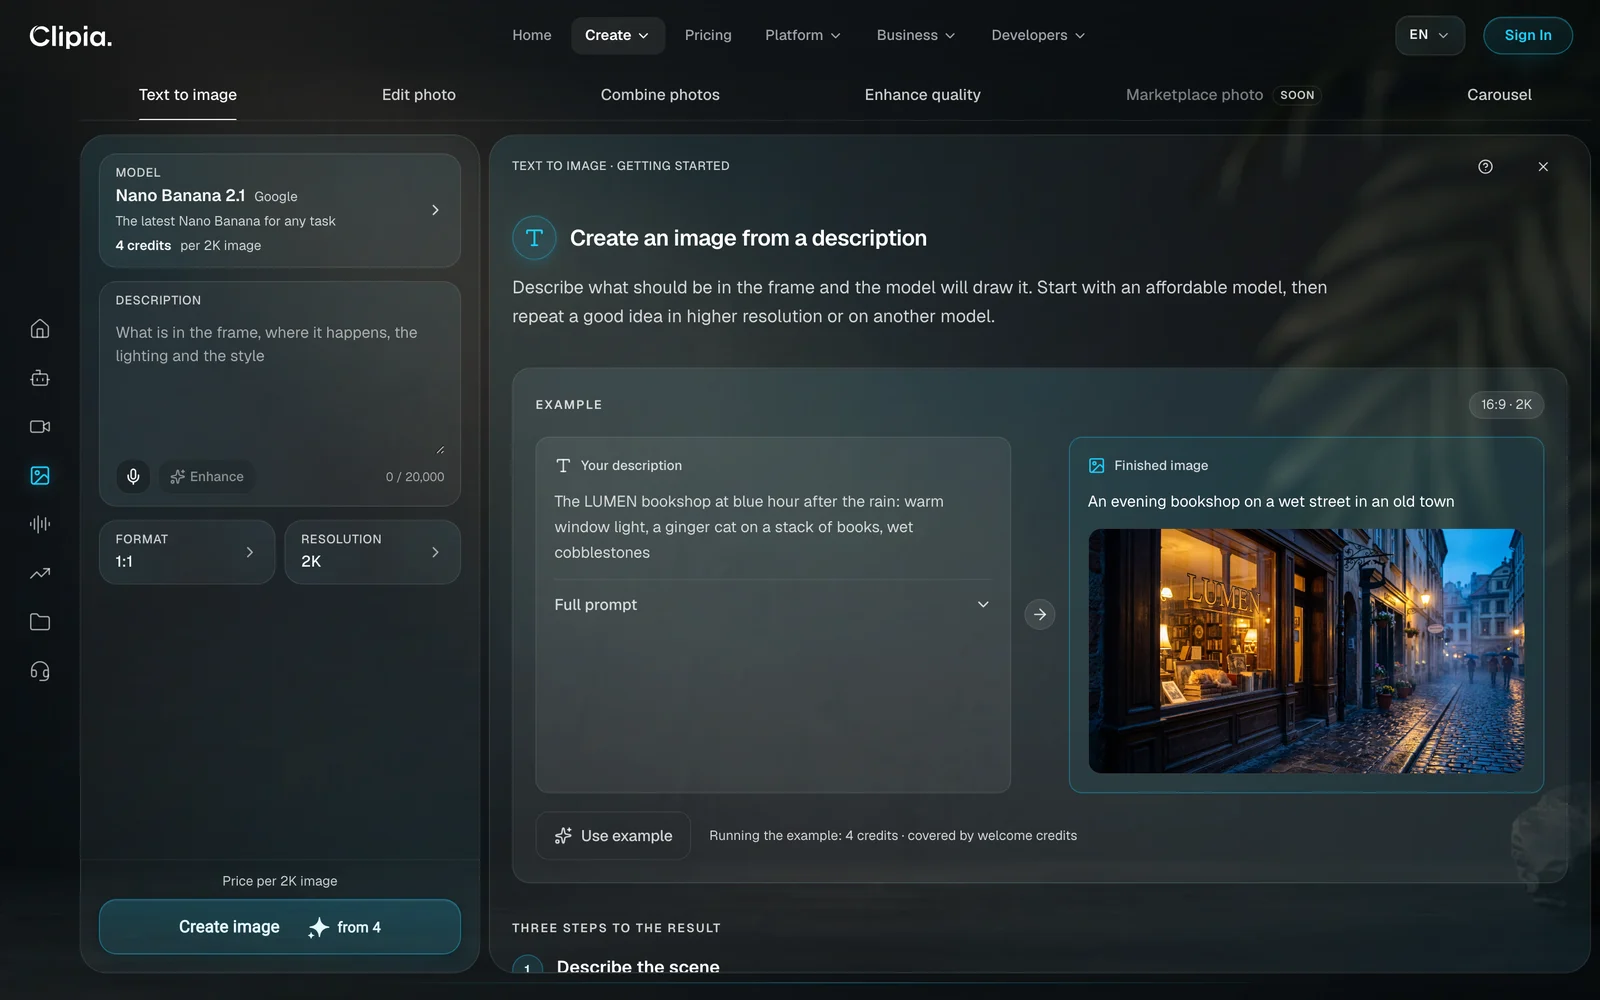
The Clipia image studio is a single page where each tab stands for a task rather than a technical setting. You choose what you want to get, and the form shows only the fields that task needs: a description in one tab, a photo upload in another, a single button in a third. A default model is already selected, the price is printed on the button, and an example on the right shows the input and the finished result. One click on Use example copies it into the form.
Three things work the same way in every tab. Credits are charged after you start, and they are returned if the job fails for a technical reason. The finished file downloads without a Clipia watermark. And every result has a Use in… menu that sends the image straight to another tab or to the video studio.
1. How to create an image from text
Best for: a post illustration, a cover, a concept, a story background — anything that does not exist yet in any form.
The default model is Nano Banana 2.1 by Google: 4 credits per 2K image. The description field takes up to 20,000 characters. Results usually arrive in 10 seconds to a minute.
Step 1. Describe the scene
A formula that works: who or what is in the frame, where it happens, the lighting and the style. This one comes from the studio itself:
The LUMEN bookshop at blue hour after the rain: warm window light, a ginger cat on a stack of books, wet cobblestones
If you have the idea but not the words, press Enhance. It fills in lighting, angle and texture details for you.
Step 2. Choose the format and resolution
Formats are 1:1, 16:9, 3:2, 9:16 and 2:3. Use 1:1 or 2:3 for a feed post, 9:16 for stories and vertical video, 16:9 for covers and banners. Resolution affects the price, and the number on the Create image button updates as you change it.
Step 3. Create, then refine
Press Create image. The result replaces the example and stays in your history. From there you can download a PNG or JPG, repeat the idea on another model, or open Use in… and pass the image to the next tab.
2. How to edit a photo with a prompt
Best for: replacing a background, changing clothes, removing an unwanted object, fixing the light — when the photo already exists and everything else in it must stay.
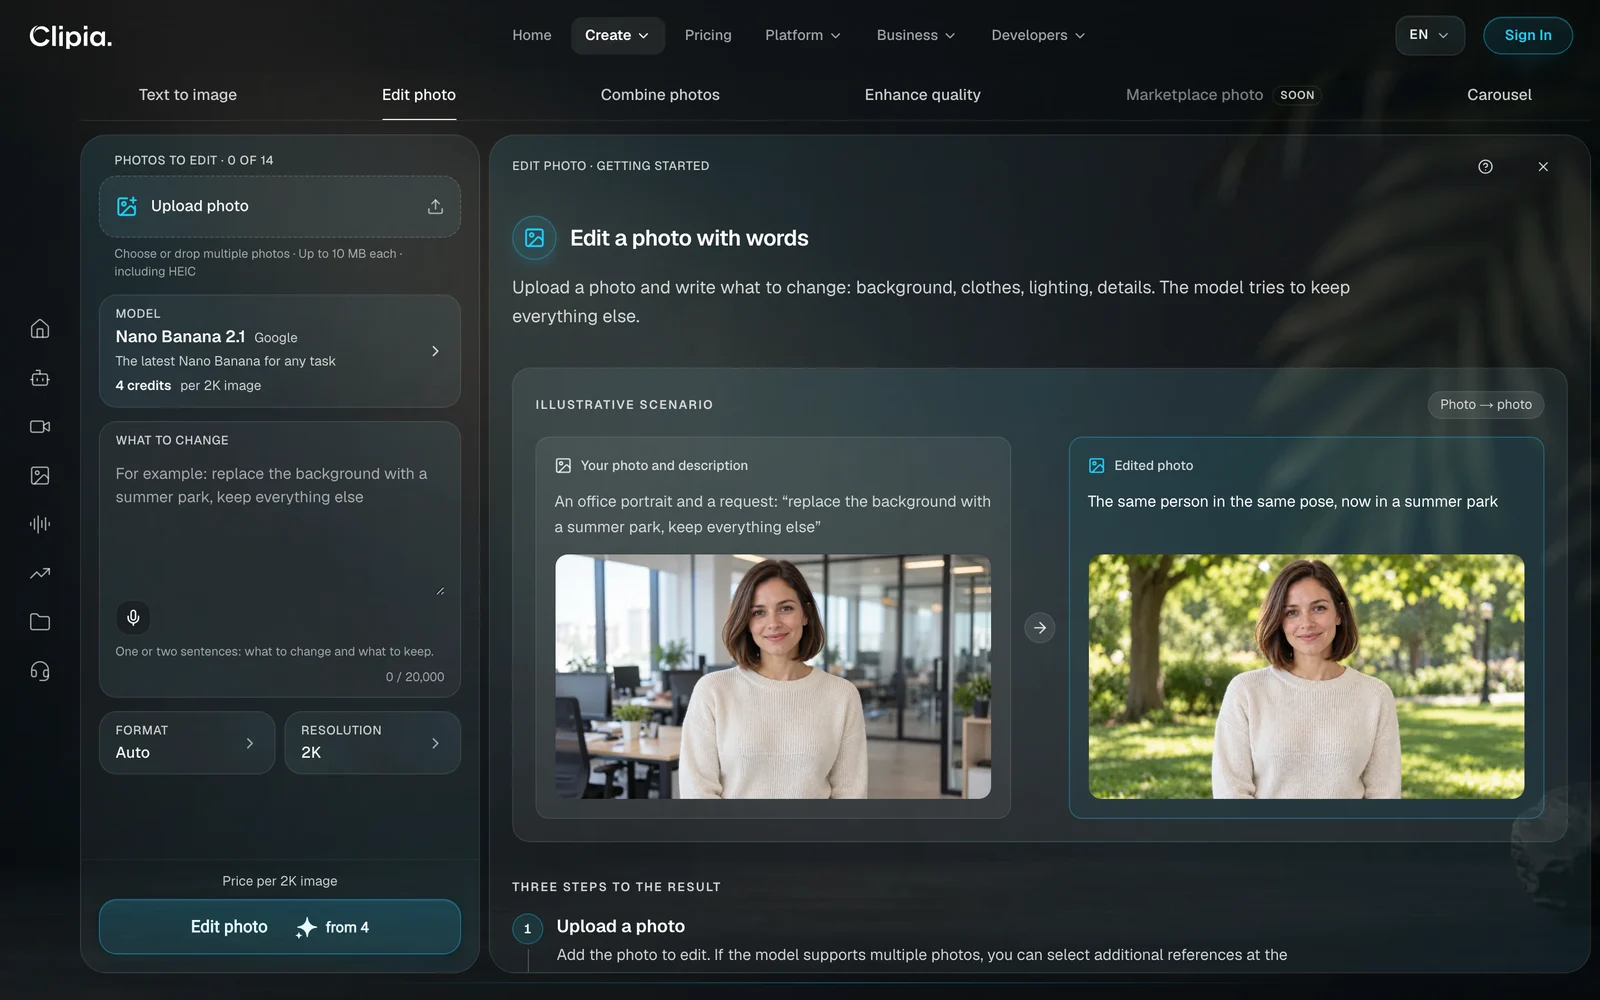
The Edit photo tab accepts up to 14 photos of up to 10 MB each, including HEIC from an iPhone. If the model supports several images, you can add references next to the photo you are editing: a background, a garment, a style. With the default model the price starts at 4 credits per 2K image.
Step 1. Upload the photo
Use the original file, not a screenshot or a copy forwarded through a messenger. A recompressed picture gives a soft, smeared result.
Step 2. Write one edit
The What to change field needs one or two sentences: what to change and what to keep.
Replace the background with a summer park, keep everything else
The Auto format keeps the aspect ratio of your original.
Step 3. Check and tighten
If the model touched something it should not have, add the restriction to the instruction — “keep the face and pose unchanged”, “leave the clothes as they are” — and run it again.
| Weak prompt | Strong prompt |
|---|---|
| Remove the clutter | Remove the red car on the left in the background |
| Make it nicer and change the background, outfit and hair | Replace the background with a city at dusk, keep everything else |
| Add some text | Add the words “Coffee & Books” to the sign in white letters |
You can switch models to fit the job. Editing is available with Nano Banana 2 and Nano Banana Pro by Google, GPT Image 2 by OpenAI, Seedream 5.0 by ByteDance, FLUX Kontext by Black Forest Labs and Qwen Image 2 by Alibaba. FLUX Kontext is the most careful about changing only what you named. GPT Image 2 is stronger with lettering: put the exact words in quotes.
3. How to combine several photos into one
Best for: putting two people in one shot, trying on a garment, placing a product in an interior, carrying the style of one picture onto another.
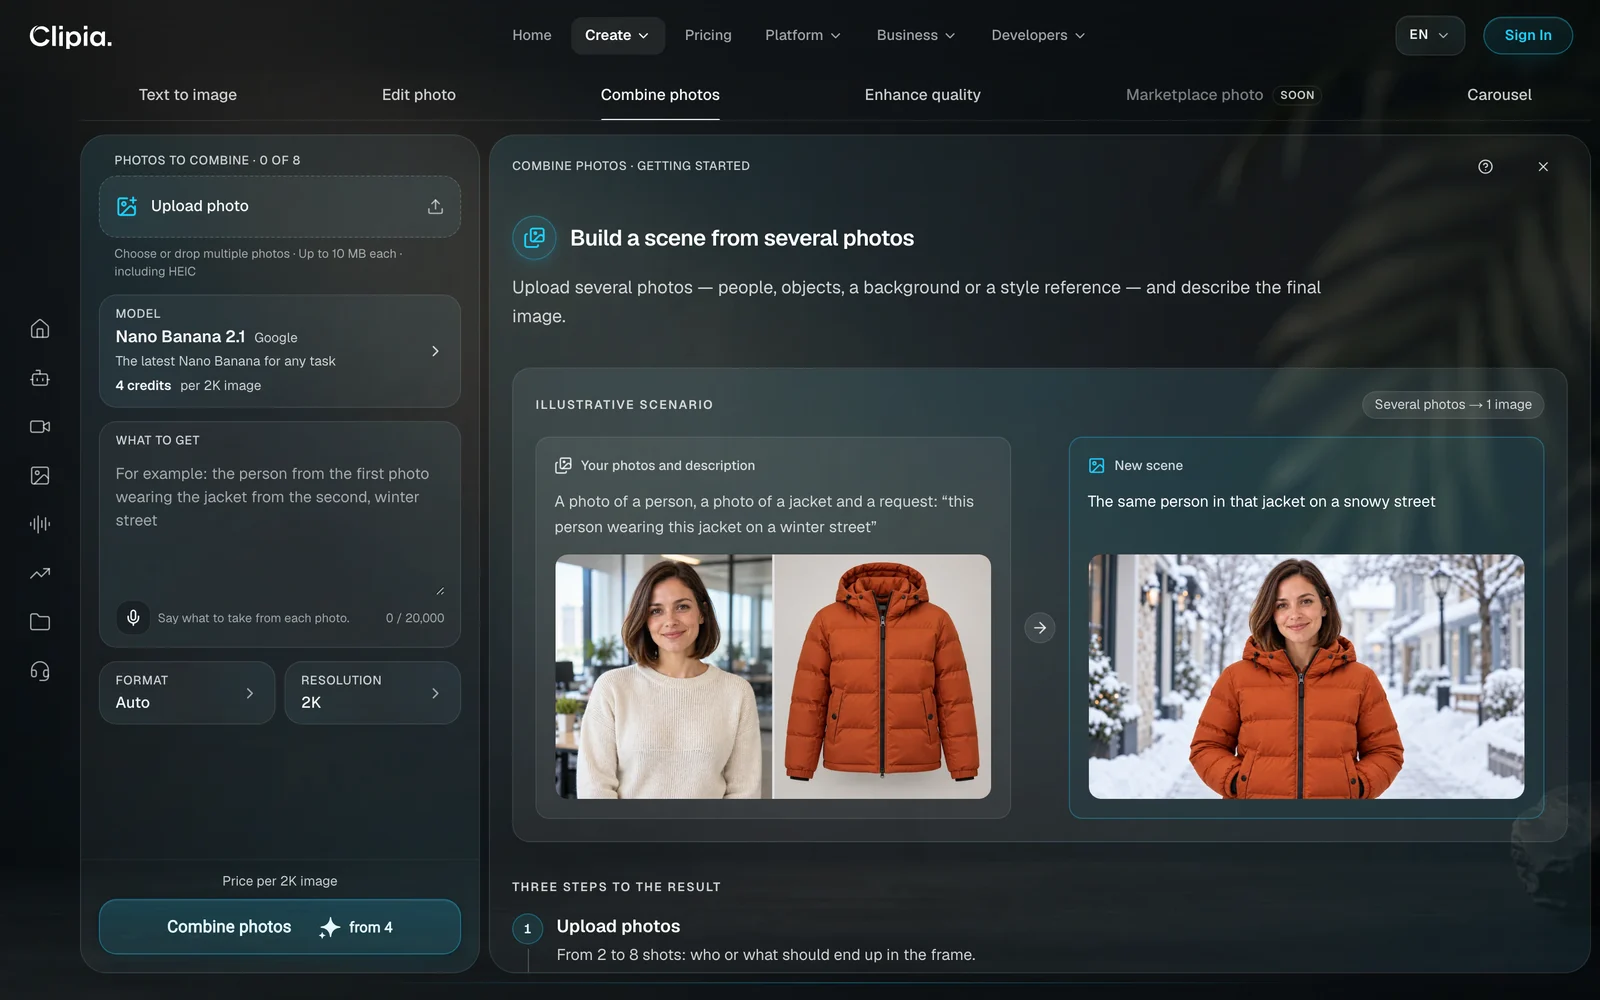
In the Combine photos tab you upload 2 to 8 pictures and describe the final shot. This is not a collage. The model does not glue images side by side; it draws a new scene with shared lighting and perspective. The number of photos does not change the price: from 4 credits per result.
Step 1. Upload 2 to 8 photos
Each photo is one ingredient of the final frame: a person, an object, a place, a style reference. Pictures with similar lighting and angles blend most naturally.
Step 2. Say what to take from each
In the What to get field, refer to the photos by their order.
The person from photo 1 wearing the jacket from photo 2 stands on a snowy street in the evening, street-lamp light, waist-up shot
Step 3. Fix mixed-up details
Be direct: “the jacket from the second photo”, “take only the colours and look from the last photo”. For a recognisable face, upload a sharp front-facing photo without heavy filters.
4. How to upscale an image and improve its quality
Best for: a small picture you need to print, a blurry phone photo, an old scan, a shot for a website or a product listing.
Enhance quality is the simplest tab: one photo, one button, 3 credits. Clipia Photo Enhance raises the resolution up to 4× and sharpens details while the proportions stay the same. There are no models to choose and no sliders to adjust.
- Upload one file up to 10 MB: JPG, PNG, WebP, HEIC, AVIF, TIFF, BMP or GIF.
- Press Enhance quality. The price is fixed and shown on the button.
- Download the result or send it to another tab.
Two limits are worth knowing in advance. Enhancement works with what is already in the picture and does not invent missing parts: a torn corner of an old photo will not come back. And it belongs at the end of the workflow. Edit first, upscale last — otherwise you pay to sharpen a frame you are about to change.
5. How to make a carousel post
Best for: a how-to, a list, a breakdown, a checklist — a post where one idea splits into steps people swipe through.
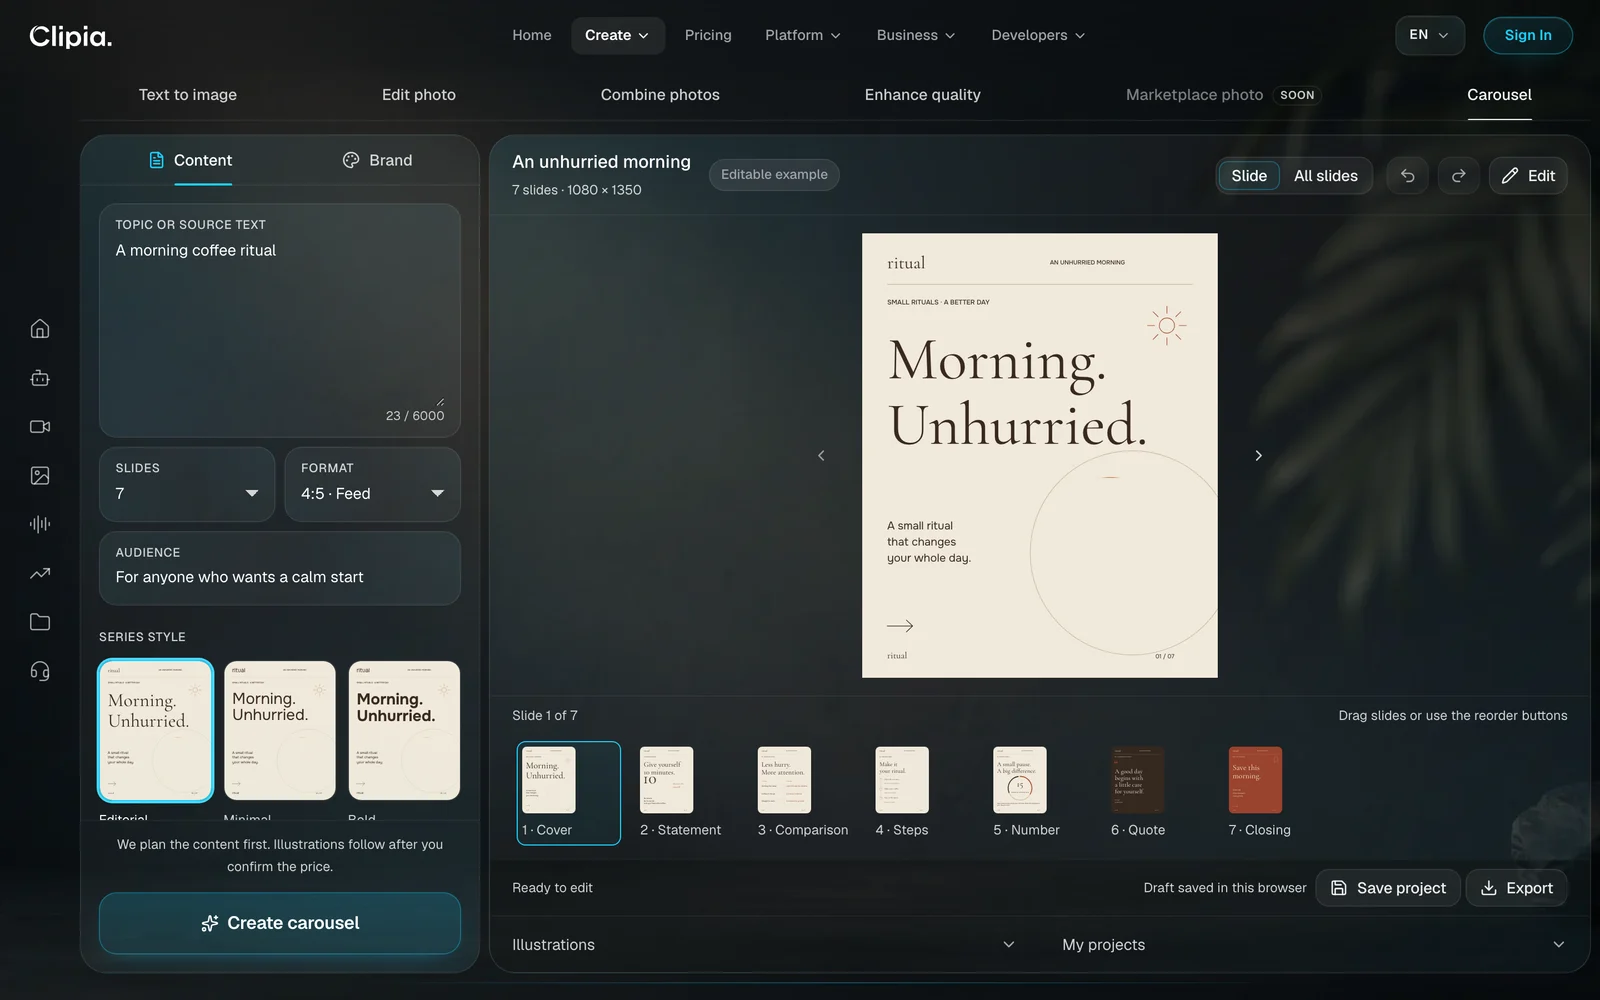
Carousel works differently from the other tabs: it is a project editor. You give it a topic or up to 6,000 characters of your own text, the AI lays it out across 4 to 12 slides, and everything after that is editable by hand.
Step 1. Set the content
On the Content tab, enter the topic, name your readers in the Audience field and choose the number of slides.
Five morning habits that help you not start the day with your phone. For readers of a slow-living blog. Warm tone, no lecturing
Step 2. Pick the format and series style
The default is Feed 4:5, which is 1080×1350 pixels. There are also Square 1:1, Portrait 3:4, Pin 2:3, Story 9:16, Widescreen 16:9, Landscape 1.91:1 and a custom size from 320 to 4096 pixels. Three series styles are available: Editorial, Minimal and Bold.
Step 3. Set up the brand
The Brand tab holds the brand name, logo, palette, font and title size. These settings apply to the whole series, so the slides read as one publication rather than seven unrelated pictures.
Step 4. Edit and export
The AI spreads the text across seven layouts: Cover, Statement, Comparison, Steps, Number, Quote and Closing. You edit the text of every slide by hand and drag slides into a new order. Illustrations are ordered with a separate button after you see the price; they are drawn by Nano Banana 2. Export gives you the whole series as a PNG or JPG archive, or a single slide.
To publish, upload the downloaded images as one post. Feed 1080×1350 and Square 1080×1080 both suit a LinkedIn or Instagram carousel.
Which AI image model should you choose?
Text to image, Edit photo and Combine photos all start on Nano Banana 2.1, and it covers most tasks. Switching models makes sense in four cases.
| Task | Model | Why |
|---|---|---|
| An all-round start | Nano Banana 2.1 (Google) | 4 credits per 2K image, handles most prompts well |
| Text inside the image | Nano Banana Pro (Google), GPT Image 2 (OpenAI) | The most accurate at logos, signs and captions |
| A precise edit with no side effects | FLUX Kontext (Black Forest Labs) | Changes only what you asked for |
| A scene from several photos | Nano Banana 2 and Pro, Seedream 5.0 (ByteDance), FLUX 2, Wan 2.7 Image (Alibaba) | Accept several pictures as parts of one shot |
The studio catalogue also includes Midjourney, Imagen 4 and Qwen. For a detailed comparison, see the guide to choosing an image model.
How to write a prompt that works the first time
- Lead with the main subject. “A ginger cat on a stack of books” carries more weight at the start of the description than at the end.
- Name the light. “Blue hour”, “morning light from a window”, “hard midday sun” — one phrase shifts the mood more than three adjectives.
- State the shot and angle. “Close-up”, “top-down view”, “waist-up” save you from a random composition.
- One scene, one idea. Five subjects doing five different things in one frame almost always turn to mush.
- Put lettering in quotes. And use a model that can actually draw it.
Ready-made formulas are in AI image prompts and how to write prompts for AI.
How many credits does an AI image cost?
| Action | Default model | Price |
|---|---|---|
| Text to image, 2K | Nano Banana 2.1 | 4 credits |
| Photo edit, 2K | Nano Banana 2.1 | from 4 credits |
| Combining 2 to 8 photos, 2K | Nano Banana 2.1 | from 4 credits |
| Quality enhancement | Clipia Photo Enhance | 3 credits |
New accounts get 5 welcome credits, enough for one 2K image or one quality enhancement. After that, plans start from $10 per month, and the Basic plan includes 240 credits. One subscription covers every model.
Common mistakes and how to fix them
- Editing a photo in Text to image. That tab draws from scratch and never sees your picture. Use Edit photo.
- Asking for five edits at once. The model does two and alters the face. One edit per run.
- Upscaling first. Every edit creates the image again. Enhancement is the last step.
- Expecting enhancement to add detail that is not there. It sharpens what exists. To add an object, use Edit photo.
- Combining photos with clashing light. The scene will assemble but look pasted together. Choose sources with similar lighting.
More on AI images, video and audio
- How to make AI videos: 6 ways, step by step — what to do with a finished image next.
- How to make an AI voice over — voice, music and subtitles for your clip.
- What changed in Clipia's studios in October 2026 — a short before-and-after.
Frequently asked questions
How do I use an AI image generator?
Open the Text to image tab, describe the scene — who or what is in the frame, where, the lighting and the style — choose a format and press Create image. The result is usually ready in 10 seconds to a minute.
Can AI edit a photo I already have?
Yes. In the Edit photo tab, upload the picture and write one instruction, such as “replace the background with a summer park, keep everything else”. The model returns an edited version and your original stays untouched.
How do I change the background without changing the face?
Write “replace the background with …, keep everything else”. If the face still drifts, add “keep the face and pose unchanged” and run it again. For the most careful edits, choose FLUX Kontext.
How do I combine two photos into one with AI?
Upload both pictures to the Combine photos tab and describe the shared shot, referring to the photos by order: “the person from photo 1 stands by the window in photo 2”. You get one new image, not a collage.
How do I upscale an image without losing quality?
Upload the file to the Enhance quality tab and press the button. The service raises the resolution up to 4× and rebuilds fine detail instead of stretching pixels. It costs 3 credits.
Which AI model is best for text inside an image?
Nano Banana Pro and GPT Image 2 render logos, signs and captions most accurately. Put the exact words in quotes inside your prompt.
How many credits does one image cost?
With the default model, 4 credits per 2K image. Quality enhancement costs 3 credits. The price for other models and resolutions is shown on the button before you start.
Can I use AI images commercially?
Yes: in ads, on social media, on marketplaces and in print, in accordance with the service's terms of use. Clipia does not add its own watermark to the result.
Try it yourself on Clipia
60+ models for video and image generation. One account, transparent pricing.